
8 Foot Picnic Table Plans: A Comprehensive Guide

Discover detailed 8-foot picnic table plans in PDF format, offering step-by-step instructions, cutting lists, and 3D diagrams for DIY enthusiasts.
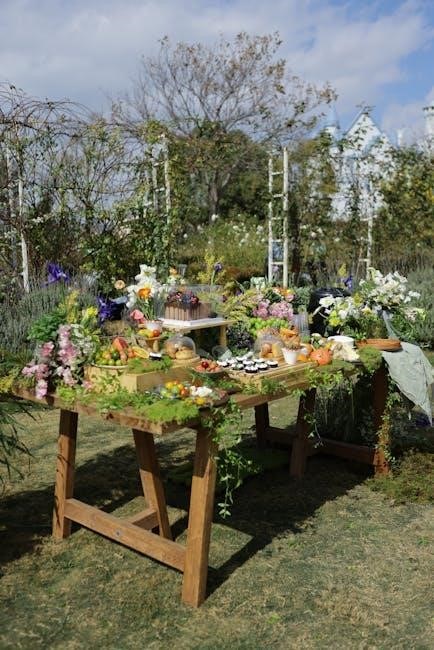
Embarking on a DIY picnic table project is a rewarding experience, and 8-foot plans are exceptionally popular for accommodating families and gatherings. These plans, frequently available as downloadable PDF files, provide a comprehensive guide for constructing a durable and attractive outdoor centerpiece.
The accessibility of free and premium 8-foot picnic table plans online makes this project achievable for various skill levels. PDF formats ensure consistent formatting and easy printing, allowing builders to follow detailed instructions, shopping lists, and cutting diagrams with precision.
Whether you’re a seasoned woodworker or a beginner, these plans simplify the process, offering clarity on material selection, tool requirements, and assembly techniques. Successfully completing this project results in a functional and aesthetically pleasing addition to any backyard or outdoor space, perfect for enjoying meals and creating lasting memories.
Why Choose an 8 Foot Picnic Table?
An 8-foot picnic table strikes an ideal balance between seating capacity and space efficiency, making it a versatile choice for various outdoor settings. PDF plans for this size commonly accommodate six to eight adults comfortably, perfect for family meals, casual gatherings, or backyard barbecues.
Compared to smaller tables, an 8-foot model offers ample surface area for food, drinks, and activities, enhancing the outdoor dining experience. Its generous size doesn’t overwhelm smaller yards, yet provides sufficient space for larger groups.
Furthermore, readily available PDF plans simplify construction, even for DIY beginners. The standardized dimensions allow for easy material sourcing and efficient assembly; Choosing an 8-foot picnic table, guided by detailed PDF instructions, delivers a practical and inviting outdoor feature for years to come.
Materials Needed for Construction
Based on typical 8-foot picnic table plans available in PDF format, you’ll primarily require pressure-treated lumber to withstand outdoor elements. Specifically, 2×6 lumber is commonly used for the tabletop and bench seats, with 4×4 posts for the legs and support structures.
A standard materials list, often included in PDF plans, will detail quantities needed – typically around ten 2x6x8’ boards and four 4x4x8’ posts. Additionally, you’ll need exterior-grade wood screws (various lengths), wood glue for added strength, and potentially wood filler for a smoother finish.
Don’t forget to factor in materials for finishing, such as exterior wood stain or sealant, and sandpaper for surface preparation. Detailed PDF plans often include a comprehensive shopping list, streamlining the procurement process and ensuring you have everything on hand before starting construction.
Tools Required for Building
Successfully executing 8-foot picnic table plans, often found as PDF downloads, necessitates a range of tools. A circular saw is essential for accurately cutting lumber to specified dimensions, as detailed in the plans. A power drill with various bits is crucial for pre-drilling holes and driving screws.
For smoother results, an electric sander is highly recommended, along with sandpaper of varying grits. A measuring tape, speed square, and pencil are vital for precise marking and layout. Clamps are incredibly useful for holding pieces together during assembly, ensuring strong joints.
Depending on the PDF plan’s complexity, you might also need a level to ensure a stable tabletop, a wrench for tightening bolts, and safety glasses and gloves for protection. Many plans suggest a miter saw for angled cuts, improving the table’s aesthetic appeal.
Understanding the PDF Plans
Most 8-foot picnic table PDF plans begin with a materials list, detailing lumber quantities and fastener types. Pay close attention to lumber dimensions – 2x6s are common, but variations exist. A cutting list is crucial; it specifies the length of each piece, minimizing waste and ensuring accuracy.
Diagrams are the core of these plans, illustrating assembly sequences. Understand the perspective – isometric views are common. Look for callouts indicating screw or bolt placement and sizes. Some plans include 3D renderings for better visualization.
Key elements to identify are the tabletop construction, bench support framing, and leg attachment methods. Premium plans often offer detailed joinery instructions. Before starting, review the entire PDF to grasp the overall process and identify potential challenges. Familiarize yourself with all symbols and abbreviations used.
Step 1: Cutting the Lumber
Begin by meticulously transferring the dimensions from your 8-foot picnic table PDF cutting list onto the lumber. Accuracy is paramount; double-check each measurement before cutting. Utilize a circular saw for straight cuts, ensuring a sharp blade for clean edges. A miter saw is ideal for angled cuts, if required by the plans.
Prioritize safety – wear safety glasses and hearing protection. Support long boards adequately to prevent splintering or binding. Cut slightly outside the marked line, then refine with a hand plane or sander for a precise fit. Label each piece immediately after cutting, referencing the PDF plans to avoid confusion.
Organize the cut lumber systematically, grouping pieces by component (tabletop, benches, legs). This streamlines the assembly process. Consider cutting all similar lengths simultaneously for efficiency.
Step 2: Assembling the Tabletop
Following your 8-foot picnic table PDF plans, begin assembling the tabletop by laying out the cut planks side-by-side. Ensure the best faces are oriented upwards. Use wood glue liberally along the edges of each plank, then clamp them tightly together. Clamps are crucial for a strong, even bond – use plenty!
Reinforce the glued joints with screws or bolts, as specified in the plans. Predrill holes to prevent splitting the wood. Countersink the screws for a flush finish. Wipe away any excess glue immediately with a damp cloth. Allow the glue to dry completely, typically 24 hours, before proceeding.
Once dry, inspect the tabletop for any gaps or unevenness. Sand the surface smooth, starting with a coarser grit sandpaper and finishing with a finer grit for a polished feel.
Step 3: Building the Bench Supports
Referring to your 8-foot picnic table PDF plans, construct the bench supports. These typically involve creating rectangular frames from 2×6 lumber. Cut the lumber to the specified lengths for the horizontal and vertical supports, ensuring accurate measurements for a stable bench.
Assemble the frames using wood glue and screws. Again, pre-drilling is essential to avoid splitting. Pay close attention to the plans regarding the placement of screws and the use of any reinforcing brackets. Ensure the frames are square – use a carpenter’s square to verify right angles.
These supports will attach to the underside of the tabletop and provide the foundation for the benches. Double-check the dimensions against the plans before proceeding, as accurate bench supports are vital for comfort and stability.
Step 4: Attaching the Bench Frames
Consult your 8-foot picnic table PDF plans for precise placement of the bench frames; Position the assembled bench supports underneath the tabletop, aligning them according to the specified measurements. Typically, they are inset from the table edges to provide comfortable seating.
Secure the frames to the tabletop using wood screws. Pre-drilling pilot holes is crucial to prevent the wood from splitting, especially when working close to the edges. Use screws of appropriate length to ensure a strong connection without penetrating through the tabletop.

Reinforce the attachment points with wood glue for added stability. Ensure the frames are level and securely fastened before moving on. A properly attached bench frame is essential for the overall durability and usability of your picnic table.
Step 5: Constructing the Legs
Refer to your 8-foot picnic table PDF plans for the leg dimensions and angles. Typically, legs are constructed from 4×4 lumber, providing robust support. Cut the lumber to the required lengths, ensuring accurate measurements for a level table.
Create any necessary angled cuts at the top of the legs to match the tabletop’s underside. These angles are critical for a flush and secure connection. Assemble the legs, potentially using mortise and tenon joints or simpler screw-and-glue methods, as detailed in your plans.
Reinforce the leg structure with cross braces for added stability. These braces connect the legs, preventing wobbling and distributing weight evenly. Ensure all joints are strong and square before proceeding to the next step.

Step 6: Connecting Legs to Tabletop
Consult your 8-foot picnic table PDF plans for the precise leg placement and attachment method. Carefully position the assembled legs beneath the tabletop, ensuring they are equidistant from the ends and sides.
Secure the legs using heavy-duty screws, bolts, or a combination of both. Predrill pilot holes to prevent the wood from splitting, especially when working with hardwoods. Apply wood glue to the contact surfaces for a stronger, more durable bond.
Verify that the legs are firmly attached and that the tabletop is level. Use clamps to hold the legs in place while the glue dries and the fasteners are tightened. Double-check all connections for stability before moving on.
Step 7: Reinforcing the Structure
Refer to your 8-foot picnic table PDF plans for recommended reinforcement techniques. Adding support braces between the legs and the tabletop significantly enhances stability and prevents wobbling. These braces can be constructed from 2×4 lumber, cut to fit snugly within the frame.
Consider installing angled supports under the benches, connecting them to the leg frames. This will distribute weight more evenly and reduce stress on the joints. Use strong wood screws and glue for secure attachment.
Inspect all connections and tighten any loose fasteners. A well-reinforced picnic table will withstand years of use and resist damage from weather and wear. Prioritize structural integrity for long-lasting enjoyment.
Step 8: Sanding and Finishing
Consult your 8-foot picnic table PDF plans for finishing recommendations. Begin with thorough sanding, starting with 80-grit sandpaper to remove rough edges and imperfections, progressing to 120-grit, and finally 220-grit for a smooth surface. Pay close attention to corners and edges to prevent splinters.
Apply a wood sealant or primer to protect the wood from moisture and UV damage. Allow it to dry completely before applying your chosen finish. Options include exterior-grade paint, stain, or varnish.
Multiple coats of finish will provide enhanced durability and weather resistance. Allow each coat to dry fully before applying the next. A professionally finished picnic table will not only look beautiful but also last for years to come.
Wood Selection for Durability
Your 8-foot picnic table PDF plans may suggest specific wood types, but consider durability when choosing materials. Pressure-treated pine is a cost-effective option, resistant to rot and insects, ideal for outdoor use. However, it requires careful handling and sealing.
Cedar and redwood are naturally weather-resistant, offering beautiful aesthetics and longevity, but come at a higher price point. These woods contain oils that repel insects and decay. Hardwoods like oak or maple provide exceptional strength and durability, but are significantly more expensive and heavier.
Always check the PDF plans for recommended lumber dimensions and ensure the wood is kiln-dried to minimize warping and cracking. Proper wood selection is crucial for a long-lasting picnic table.
Choosing the Right Fasteners
Your 8-foot picnic table PDF plans will likely specify fastener types, but understanding their properties is vital. Galvanized or stainless steel screws are essential for outdoor projects, preventing rust and corrosion. Avoid using standard steel screws, as they will quickly deteriorate.
Deck screws are a popular choice, offering excellent holding power and weather resistance. Consider using screws with a star drive (Torx) for better bit engagement and reduced stripping. For added strength, especially in high-stress areas, bolts with washers and locknuts can be used.
The PDF plans may also recommend wood glue in conjunction with screws for a stronger, more durable bond. Ensure the glue is waterproof and suitable for outdoor use. Proper fastener selection guarantees a structurally sound picnic table.
Safety Precautions During Construction
When following your 8-foot picnic table PDF plans, prioritize safety. Always wear safety glasses to protect your eyes from flying debris while cutting and drilling. A dust mask is crucial to avoid inhaling sawdust, especially when working with treated lumber.
Use hearing protection when operating power tools like saws and sanders. Secure your workpiece with clamps to prevent movement during cutting and assembly. Be mindful of your surroundings and keep children and pets away from the work area.
When using power tools, always unplug them before making adjustments or changing blades. Wear work gloves to protect your hands from splinters and abrasions. If you’re unfamiliar with a tool, consult the manual or seek guidance before use.
Customization Options & Design Variations
Your 8-foot picnic table PDF plans are a starting point for creativity! Consider adding a central umbrella hole for shade during sunny days. Explore different wood stain colors to match your outdoor décor, or paint it with vibrant hues for a playful look.
For added comfort, design contoured bench seats instead of flat planks. You could also incorporate a small storage shelf beneath the tabletop for holding outdoor games or picnic essentials. Modify the leg style – A-frame, straight, or even curved – to achieve a unique aesthetic.
Experiment with backrests for the benches, enhancing comfort for extended gatherings. Remember to adjust your materials list and cutting dimensions accordingly when implementing these customizations.
Free vs. Premium Picnic Table Plans
Numerous 8-foot picnic table PDF plans are available online, ranging from free to premium options. Free plans often provide basic diagrams and material lists, suitable for experienced DIYers comfortable interpreting simpler instructions. However, they may lack detailed explanations or 3D visualizations.
Premium plans, conversely, typically offer comprehensive step-by-step guidance with high-quality illustrations, cutting lists, and sometimes even video tutorials. These are ideal for beginners or those seeking a more streamlined building process. They often include advanced features like detailed joinery techniques and material optimization.
Consider your skill level and desired level of detail when choosing. While free plans save money, premium plans can save time and reduce errors, ultimately leading to a more professional and durable picnic table.
Finding Reliable PDF Downloads
Locating trustworthy 8-foot picnic table PDF plans requires careful navigation of online resources. Many websites offer free downloads, but quality and accuracy can vary significantly. Prioritize websites with established reputations and positive user reviews. Look for plans from woodworking communities or reputable DIY project sites.
Beware of sites with excessive advertising or requests for personal information before providing the download. Always scan downloaded files with antivirus software to protect against malware. Consider exploring dedicated woodworking plan marketplaces, which often curate and verify the quality of their offerings.
Checking for detailed previews or sample pages before downloading can help assess the plan’s clarity and completeness. Remember, a reliable PDF will include clear diagrams, accurate measurements, and a comprehensive materials list.
Troubleshooting Common Building Issues
When constructing your 8-foot picnic table using PDF plans, anticipate potential challenges. Uneven leg lengths are frequent; use a level and adjust accordingly with shims or careful sanding. Misaligned tabletop boards can be corrected by re-clamping and ensuring squareness before final fastening.
If screws strip, pre-drilling pilot holes is crucial. Wobbling benches often indicate loose connections – tighten all fasteners. Difficulty assembling bench supports might stem from incorrect lumber dimensions; double-check measurements against the PDF.
Remember to review the plans thoroughly before each step. Online woodworking forums can provide solutions to specific problems encountered during construction. Don’t hesitate to seek advice from experienced builders if you’re stuck!
Maintaining Your Picnic Table
To ensure longevity of your 8-foot picnic table, built from PDF plans, regular maintenance is key. Annually, inspect for loose screws and tighten them promptly. Clean the table surface with mild soap and water, avoiding harsh chemicals that can damage the wood finish.
Consider applying a fresh coat of sealant or stain every one to two years to protect against weathering and UV damage. This is especially important if you used a less durable wood type. Protect the table during harsh winters by covering it with a waterproof tarp or storing it in a sheltered area.
Promptly address any signs of rot or decay to prevent further damage. Regular upkeep will keep your picnic table looking beautiful and functional for years to come!
Cost Breakdown: Materials and Tools
Building an 8-foot picnic table using PDF plans typically ranges from $150 to $300, depending on wood choice and fastener quality. Lumber, primarily 2x6s, constitutes the largest expense, around $100-$200. Expect to spend $20-$50 on screws, bolts, and wood glue.
Tool costs vary. If you own basic tools like a saw, drill, and measuring tape, the expense is minimal. However, renting or purchasing a power saw can add $50-$100. Sandpaper and finishing supplies (stain, sealant) contribute another $30-$50.
Premium PDF plans might cost $10-$30, offering detailed 3D diagrams and cutting lists, potentially saving money on wasted materials. Prioritizing quality materials and proper tools ensures a durable and long-lasting picnic table.
DIY Tips for a Professional Finish
Utilizing 8-foot picnic table PDF plans, achieve a professional finish by pre-drilling all screw holes to prevent wood splitting. Employ countersinking bits for a flush screw appearance. Thoroughly sand all surfaces, starting with 80-grit and progressing to 220-grit for smoothness.
Apply wood filler to any gaps or imperfections before sanding. When staining, test on a scrap piece first to ensure desired color. Apply multiple thin coats of stain, allowing each to dry completely. Seal with a high-quality exterior sealant to protect against weather damage.
Consider using wood conditioner before staining to promote even absorption. For added durability, apply a second coat of sealant. Precise measurements and careful assembly, guided by your PDF plans, are key to a polished result.
Alternative Wood Options
While traditional 8-foot picnic table plans often call for pressure-treated pine, several alternatives exist. Cedar offers natural weather resistance and a beautiful aesthetic, though it’s pricier. Redwood is another durable, naturally rot-resistant option, also with a higher cost.
For a more budget-friendly choice, consider cypress, known for its moderate decay resistance. Reclaimed wood provides a rustic look and is environmentally friendly, but requires careful selection and preparation. Ensure any reclaimed wood is free of harmful chemicals.
When deviating from PDF plans, adjust fastener choices accordingly; some woods require specific screws or bolts. Always prioritize weather-resistant materials for longevity, and remember to apply a suitable sealant regardless of wood type.
Long-Term Care and Protection
To maximize the lifespan of your 8-foot picnic table, built from PDF plans, consistent maintenance is crucial. Annual cleaning with mild soap and water removes dirt and grime. Inspect for loose fasteners and tighten them promptly to maintain structural integrity.
Regularly apply a protective finish – stain, sealant, or paint – to shield the wood from the elements. Reapply every one to two years, depending on climate and wear. Consider a UV-resistant finish to prevent fading and cracking.
During winter months, covering the table can protect it from snow and ice. Store cushions and umbrellas to prevent damage. Addressing minor repairs quickly prevents larger issues, ensuring years of enjoyment from your DIY project.